Last weekend, I've got the opportunity to attend the
Art of Seeing (AOS) workshop, organised by
Saiful Nang Academy of Photography (SNAP) in Puchong. The date is kind of belated as I've registered for it in August 2009 but had to postpone it due to the demise of my youngest brother on that day. Thanks to the organiser, I was allowed to attend the workshop this time around despite more than 1 year lapse.
I was looking forward for this workshop to improve the way I’m capturing photos and ultimately to produce good and more impactful photos. The AOS workshop meant to impart the knowledge on how to enhance the way we see things and once we master the AOS, we could capture photos not just technically sound, but also beautiful, with high aesthetic value, fantastic and with meaningful and invaluable stories.
Let me share here about it and what I’ve learned throughout the 2-day workshop. The workshop was divided into 4 parts that are Introduction to the Art of Seeing, Appreciation, ‘Asah Mata’ and Critic session.
Firstly, we were introduced to the 9 important elements in a good photo. They can be summed up as follow with some tips that I’ve managed to grasp during the class:
1. Point of interest (POI) – It is the heart of the image that we want people to focus. The POI has to be clear, standout from other items in the image and need not to be explained further. To make the subject outstanding, we would position it in-front and/or higher than the rest of the items in the image. (e.g.: A hero in a movie poster is always placed in this kind of arrangement to make it stand out from the rest).
2. Simplicity – Keep it simple. Be selective in choosing background (avoid cluttered items as background) and what to put in the frame.
3. Viewpoint/Camera angle – Vary the angle of shooting to tell more stories, create more dramatic/impactful pictures, to virtually change the subject’s size or just to be different.
4. Lighting – Sun (source of light) and Moon (reflector). Observe for ‘rim light’ as it can be used for outlining the subject and subsequently create better image.
5. Contrast – can make subject STRONG by weaken anything else. Strengthen POI and its visual impact. Could be contrast in emotion of the subject as compared to the rest. (e.g.: a kid crying in the middle of a wedding). Also for separation of subject with background.
6. Creative Framing – ‘Photography is about what you frame-in and frame-out.’
7. Fore-ground, mid-ground and background – to avoid flat picture.
8. Rule of third – Interception of line is normally good to position the POI or horizon in an image. For landscape, give more space for either the land or sea when putting the horizon.
9. Pattern and texture – Use it to enhance composition and attractiveness of the image.
After the theory session, we were taught on how to appreciate a photo in the Appreciation session. Here, we were asked based on the above 9 elements, to comments on what makes the sample photos taken by Saiful Nang (SN) good. Additional tips given by SN was that a photo can also be good even without these elements such as those photos that capture the moment’s valuables to the customers such as moment related to culture/tradition etc.
Later in the afternoon, we were brought to an abandoned place near the academy for the 1st ‘Asah Mata’ session. Here, we were trained to make whatever available around the area and capture good photos despite the barren and desolate look of the area. Photo critics were given on location so that participant could improve the shot in situ.
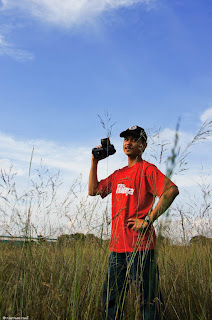
Picture of me on location (courtesy Aswad Alwee).
I’ve to admit that I’m struggling with this assignment and did not really satisfy with myself on the photos that I took as follow:

Fiq reaching for the bird.
Fiq with his shorter version of sniper rifle.
Its autumn in Puchong perhaps.
On the next day, we head straight to Chow Kit for the 2nd session of ‘Asah Mata’. Here, we were tasked to choose a particular subject in the Chow Kit market and captures 5 best photos that can tell the stories of the subject within 2 hours. During this session, I’ve shot 4 subjects before I choose the one with the most impactful stories to be submitted for the final session, Critic session. They are (click individual subject to view the photos that I’ve managed to capture):
1.
Pencelup Emas.
2.
Penjual Ulam.
3.
Penjual Martabak.
4.
Penjual Apam.
In the afternoon, we have the most awaited session, Photo Critic. In this session, I’ve submitted 5 photos on the story of the ‘Pencelup Emas’. Fortunately or unfortunately depending on how you look at it, my shots were among the few that were heavily criticised by SN. Despite this, I took the critic positively and vows to myself to improve further on my picture taking. The followings are 5 of the shots together with some of the comments I’ve received from SN.
SN - The picture is staged and does not look natural as well as the angle and composition is less impactful. It could be improved by taking the shot from the hands level with the jewellery just below the hands as the background.
SN - Avoid taking shots that are slanting. It may be famous in the early days but good photographers won’t take such shots including myself.
SN - It depicts the process of gold coating. Could be improved if the customer’s bag not in the frame as it strong colour is distracting.
SN - Detail shot is good in a series of shots to provide different viewpoint.
Almost an A+ shot if not for the partially appeared shop sign. It could be improved with the shop sign and everything in the shop fully composed within the frame.
Finally, SN concluded the workshop with an advice for the participant to immediately practice what we had learned. He also shared his view that out of the 9 elements, 3 main elements should be in every photo that are the POI, contrast and lighting.
Personally, I think the workshop has provided me with invaluable knowledge and skills that I’ve learned from all the sessions held. What I need to do next in order to fully reap from I’ve learned is practice, practice and practice. As what SN said “Good practice make perfect”.
To wrap it up, below is the video of the workshop made by the academy that summed up the AOS workshop. Happy viewing!


